Thursday, March 20, 2014

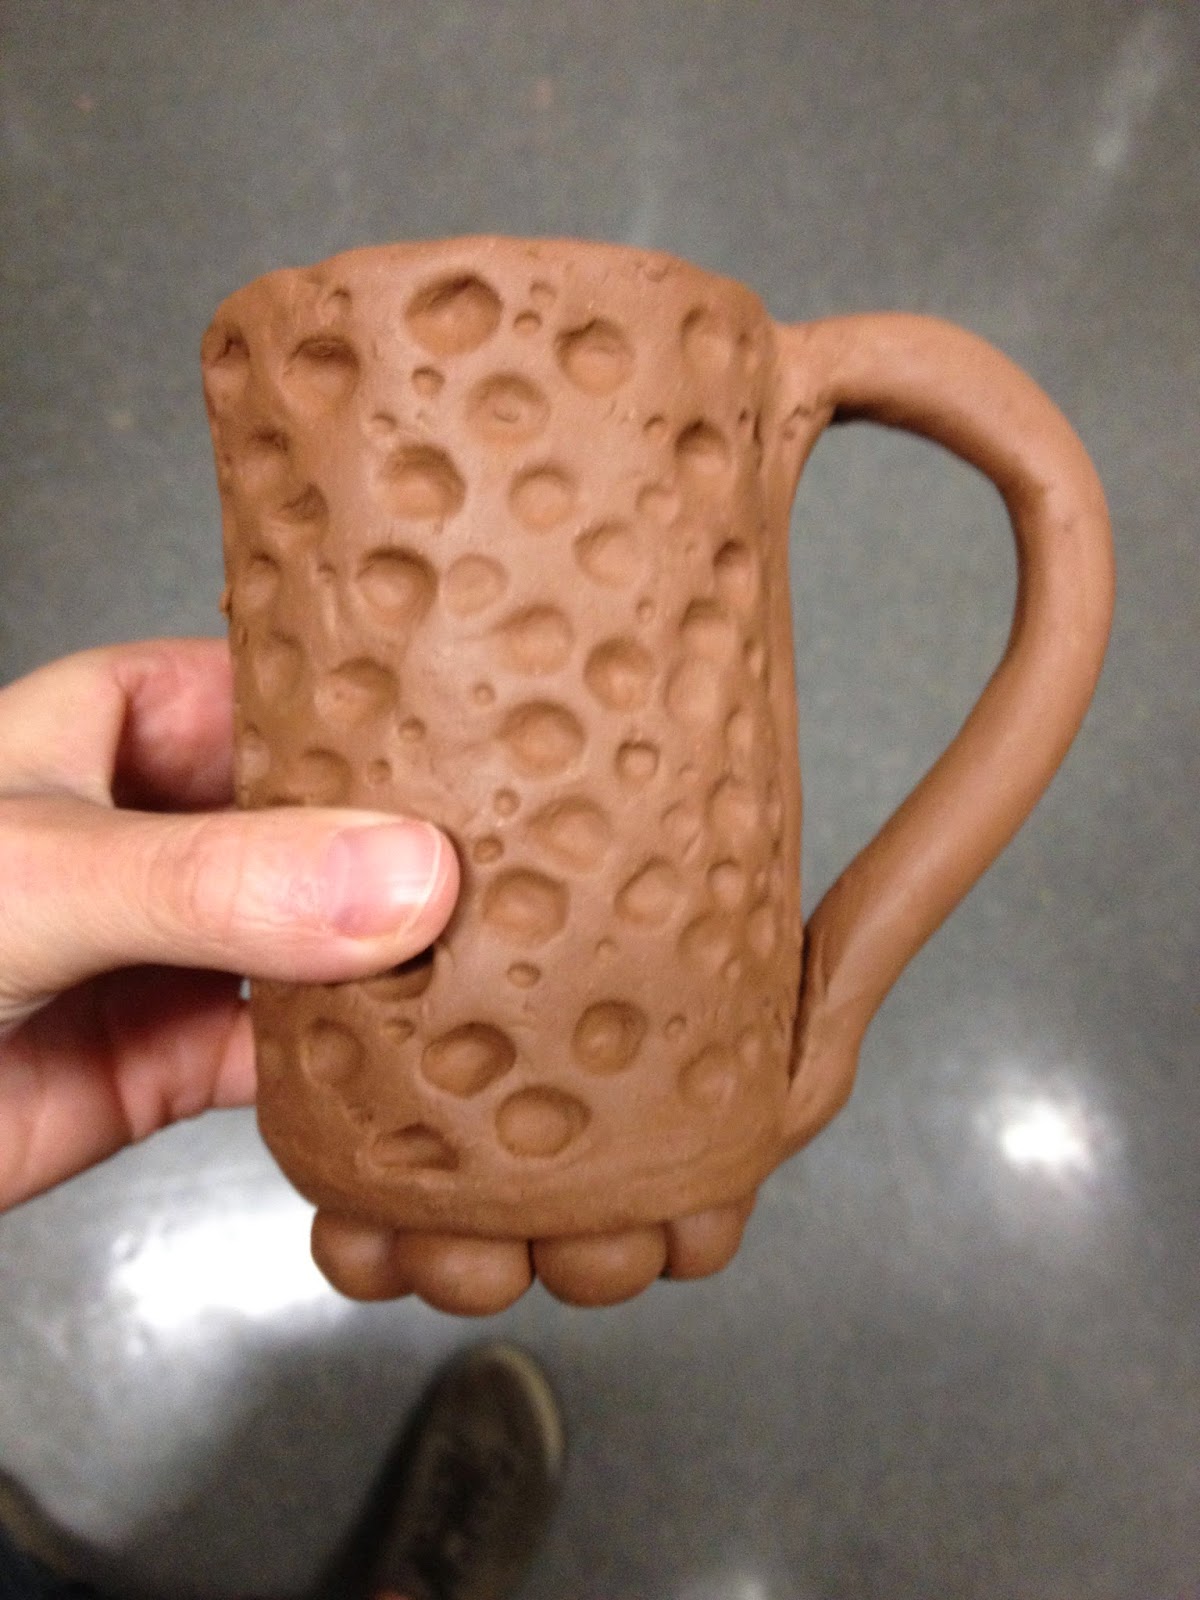
Ceramics: Stamped Mug

HAND BUILT Stamped Mug

For this project, you are creating a soft slab mug with a handle.  For the decorative surface, you are applying a stamped pattern!  The stamps are going to be made by you!

STEP 1: Stamps

You are going to create 3 different stamps out of Red Clay.  You need to take 3 small chunks of clay and form them into 1 inch cubes/cylinders, then let them dry to leather hard.  Using carving tools, carve an intricate, interesting design out of one of the sides.  Remember, what you carve will be raised on your mug!

*For design ideas, look up Zentangle patterns.


STEP 2:  Hand Built Mug

*  Design
*  Pattern
*  Test Pattern
*  Slabs
*  Construct
*  Stamp!

Step By Step Instructions


Digital Art: Branding Yourself!


BRANDING YOURSELF:

This quarter you are going to work on projects that are more practical and applicable to real Graphic Design experiences.
BUT FIRST!
You need to Brand Yourself!  You need to market your skills, your style, and figure out what audience you will appeal to!


Your project:

You are going to be designing LOGO's for yourself.  You need to think about:

- The font
- What it will say
- Colors
- Imagery
- The overall shape it will look like

FIRST!  Answer these following questions (In a word doc):

1)  Describe your personality in 3 words.

2)  What are your 3 favorite colors?

3)  What audience do you want to appeal to?  Examples:  Babies (0-24 months), Teenagers, the Elderly, etc.

4)  Describe the type of house you would want to live in.  (I know, weird question, but it would actually help tell you the type of style you like!)


THEN, you are going to choose your 'brand name'.  It can be your full name, a nick name, etc.

Examples:

Julie M. DeRolf
Julie Maria DeRolf
Jules DeRolf
Jules D
JM DeRolf
Miss D
Ms DeRolf

--LOOK AT ALL THE POSSIBILITIES!--

NOW SKETCH!  You are going to play with your Brand Name and imagery that you can put with it.  The imagery should match your 4 answers!  On the same Word Doc, make a collage of at least 6 images that appeal to you and your 'brand'.  You will send this in an e-mail to Miss D!  jderolf@westville.k12.in.us

Teacher's Example:


NOW CREATE!:  

Make a new Canvas in Photoshop:  9" x 9" 300 dpi. CLEAR BACKGROUND!

You are going to create a logo that you can place on a business card, letter head, products, etc.

You want to make sure your Brand Name is clear, that it markets to your audience, and that it won't take away attention from the products you attach it to!


Here are some examples:


Wednesday, March 19, 2014

Intro to 3D Art: Alebrijes

ALEBRIJES!


YOUR PROJECT:

You are going to create a 3 dimensional papier-mache Alebrije.  Like Mexican artists, your Alebrije need to have zoomorphic and fantastic figures that combine reptile, bird, insect and mammal parts as well as different eras and painting styles.

REMEMBER, this is a Sculpture in the Round, meaning that it is to be viewed from all angles!  You need to make sure it is interesting from all views, makes you want to walk around and look at it from all views, and that it balances because it stands alone!

 
Criteria:

1)  You are going to create sketches of 2 different Alebrijes, combining at least features from 3 different animals on 1 side of your sketch paper.

2)  You are going to choose your favorite 1 and draw it larger on the back of the paper.  Figure out how it can look interesting from ALL DIFFERENT VIEWS!  Then you are going to color it (using colored pencils + markers) with at least 3 different patterns and colors.

3)  Get your sketch approved by your teacher, then you can begin the papier mache sculpting process.  Your teacher will demo all of these steps!


Friday, March 14, 2014

Digital Art: Optical Illusion

Optical Illusions:


ARTIST BRIDGET RILEY:


ABOUT THE ARTIST


YOUR PROJECT:

You are to create a piece of Op Art.  I would rather you focus on geometric styled Optical Illusions, but if you have a brilliant idea, then of course I'm willing to work with you!

Your work should:
-  Give the feeling of MOVEMENT
-  Have limited COLOR
-  Use either LINE or SHAPE
-  You must create it all yourself!

Size:
12" x 9"; 300 DPI

Tools you will use the most are:
-Selection tools
-Layer via Copy
-Paint bucket
-Snap to Rulers

Wednesday, March 12, 2014

8th Grade Art: Facial Proportions

LESSON OVERVIEW:  Students will create two self-portrait drawings:  One utilizing the proper facial proportions and one exaggerating their unique facial features into a cartoon.  They will make historical connections between self-portraits of Renaissance artists to modern day artists.

Focused Skills:  
1)  Learning how to draw your own face using the proper facial proportions (Comparing Pre-Test to finished Project)
2)  Learning how to handle and mix chalk pastels to match your own skin and hair tones
3)  Learning how to draw a stylized Self-Portrait

History Highlights:
1)  Self Portraits in the Renaissance
2)  Proportions in the Renaissance
3)  Modern Self-Portrait Artists
4)  History of Cartoons


1]  History of Self Portraits!

Albrect Dürer's Work:

-Began doing self portraits to show commissioners his level of skill
-Enjoyed the attention and started doing self portraits for fun
-Got so full of himself that he did a self portrait facing the viewer, a position usually saved for imagery of Jesus Christ, making a statement that he was the 'God' of Art at this time.


2]  Proportions in the Renaissance:
  • The Golden Ratio!
  • Everyone has facial proportions


2A]  PRE-TEST:

Draw the best self portrait you can possibly do!
-Add all of your facial features, hair, ears (if you can see them), neck, and shoulders.
-Add a little shading
-You should be quiet while drawing and be focused!  You can't draw your mouth while it is flapping!!!

Here are some Pre-Test examples by other 8th grade artists:


2B]  Facial Proportions Worksheet


Monday, March 10, 2014

Painting: Surreal Collage Painting

Your Project:

You are going to create a Surreal Collage Painting by integrating 3 photographs of your choice onto your canvas, and using paint to smoothly transition between the images.  You are to use 3 images that do not normally visually relate, and create an interesting composition using paint.  You will transfer the photos onto your canvas using a special transferring technique, then you are to paint around and on top of the images to integrate them into the painting.

BUT FIRST!

What is Surrealism?


  • Dreamlike Imagery
  • Melting 2 images together
  • Something 'out of it's element'
  • Strange proportions

Traditional Surreal Artists:

Salvador Dali


Rene Magritte   


MODERN SURREAL ARTISTS:
Examples by
Charlotte Caron's Work!


 Examples by


Examples by
Vladimir Kush


Thursday, March 6, 2014

Digital Art: Animated GIF

CHECK THIS OUT!
(Teacher Example)

You are going to make an animated GIF (Graphics Interchange Format)!  SWEET!  For this project you are to create a non moving image come to life.  The subject is up to you!  You can be as realistic and subtle, or wacky and crazy as you prefer!


Here is another school that makes GIF's in their digital art class:

Animated Children Drawings of Monsters!

Cinemagraphs!


To get started:

-  Choose your 'story'
-  Design your slides (like a flip book) on paper first!
-  Find your images
-  Start a canvas 8.5 x 11"  300 DPI
-  Add a background, your object that is going to be animated, and any other objects
-  Put them in their first position and save that as a .PSD!!!  You will reopen this one sometimes!
-  Then flatten that and save it as a .JPG and title it animation01
-  Every image after that you are to name it animation##
-  Follow the demo on how to efficiently move your animated object and save!
-  Upload all of your .JPG's to http://www.gifmaker.me/
-  You can change the speed and size on the right side of the gifmaker
-  Upload and save your link!
-  You will upload your link to WIX